Building a 'free' AWS site-to-site VPN using OpenVPN and EdgeRouter X
I’ve been trying to upskill myself on AWS, in anticipation of taking on a “Cloud Architect” role with my new employer.
I decided to setup a site-to-site VPN between my Virtual Private Cloud (VPC) in AWS, and my home network. The VPN will allow me to deploy a monitoring host in AWS, and use it to monitor all of the gear on my home network. I’ll also be sending flow and syslog data from devices into an Amazon Elasticsearch instance for analysis and visualisation.
My home router is a NZ$100 Ubiquity EdgeRouter X, which I’ve found to be excellent value for money. I found an article by Ubiquity (from December 2018) on exactly this configuration, so I got to work to start to build it.
I followed along until, while setting up the site-to-site VPN, I checked the AWS site-to-site VPN pricing, and discovered that my little test VPN would cost me US$36/month.
Reasoning that there must be a dirty workaround since VPNs can run in software, I started searching for an OpenVPN solution, and soon found exactly what I hoped for.
OpenVPN have made an AWS AMI available for their “Access Server” product, which is free for up to 2 users. (Provided you’re eligible for the Free tier, which I think means you’ve been signed up for less than 12 months). I installed mine on a t2.micro instance, since I only intend to connect a single client (my ERX), and I don’t forsee doing any major throughput.
I followed the instructions, including:
- Subscribing to the AMI
- Generating a key
- Assigning an Elastic IP to the instance
- Adding a DNS record pointing to the Elastic IP
- SSHing into the instance using the generated key
- Running the “first start” wizard
- Setting my password by running
sudo passwd openvpnas - Logging into https://<dns-pointing-to-elb>:943/admin/ with user openvpnas and the above password
- Changing the “Hostname or IP address” value under Network Settings to match the DNS record I’d created
I created a new user under “User Permissions”, and I set this user up to …
- Be able to auto-login (necessary for a non-interactive/human client)
- Use routing for access control (172.31.0.0/16 is my entire VPC range)
- Act as a VPN gateway (192.168.29.0/24 is my home IP range)

Although I enabled auto-login, I still needed to setup a password for my “erx” user locally on the access server host, as follows:
openvpnas@openvpnas2:~$ sudo useradd erx
openvpnas@openvpnas2:~$ sudo passwd erx
Enter new UNIX password:
Retype new UNIX password:
passwd: password updated successfully
openvpnas@openvpnas2:~$
Then I logged into https://<my elastic ip>:943 as the “erx” user (password set above), and downloaded the auto-login config, as a single .ovpn file.
I SCP’d the .ovpn file to /config/openvpn/ (I had to make this directory) on the ERX, and then applied the following in configure mode:
set interfaces openvpn vtun0 mode client
set interfaces openvpn vtun0 config-file /config/openvpn/awsvpn.ovpn
I watched the logs, by running run show log tail, and saw my first attempt resulted in errors like this:
TLS_ERROR: BIO read tls_read_plaintext error: error:140760FC:SSL routines:SSL23_GET_CLIENT_HELLO:unknown protocol
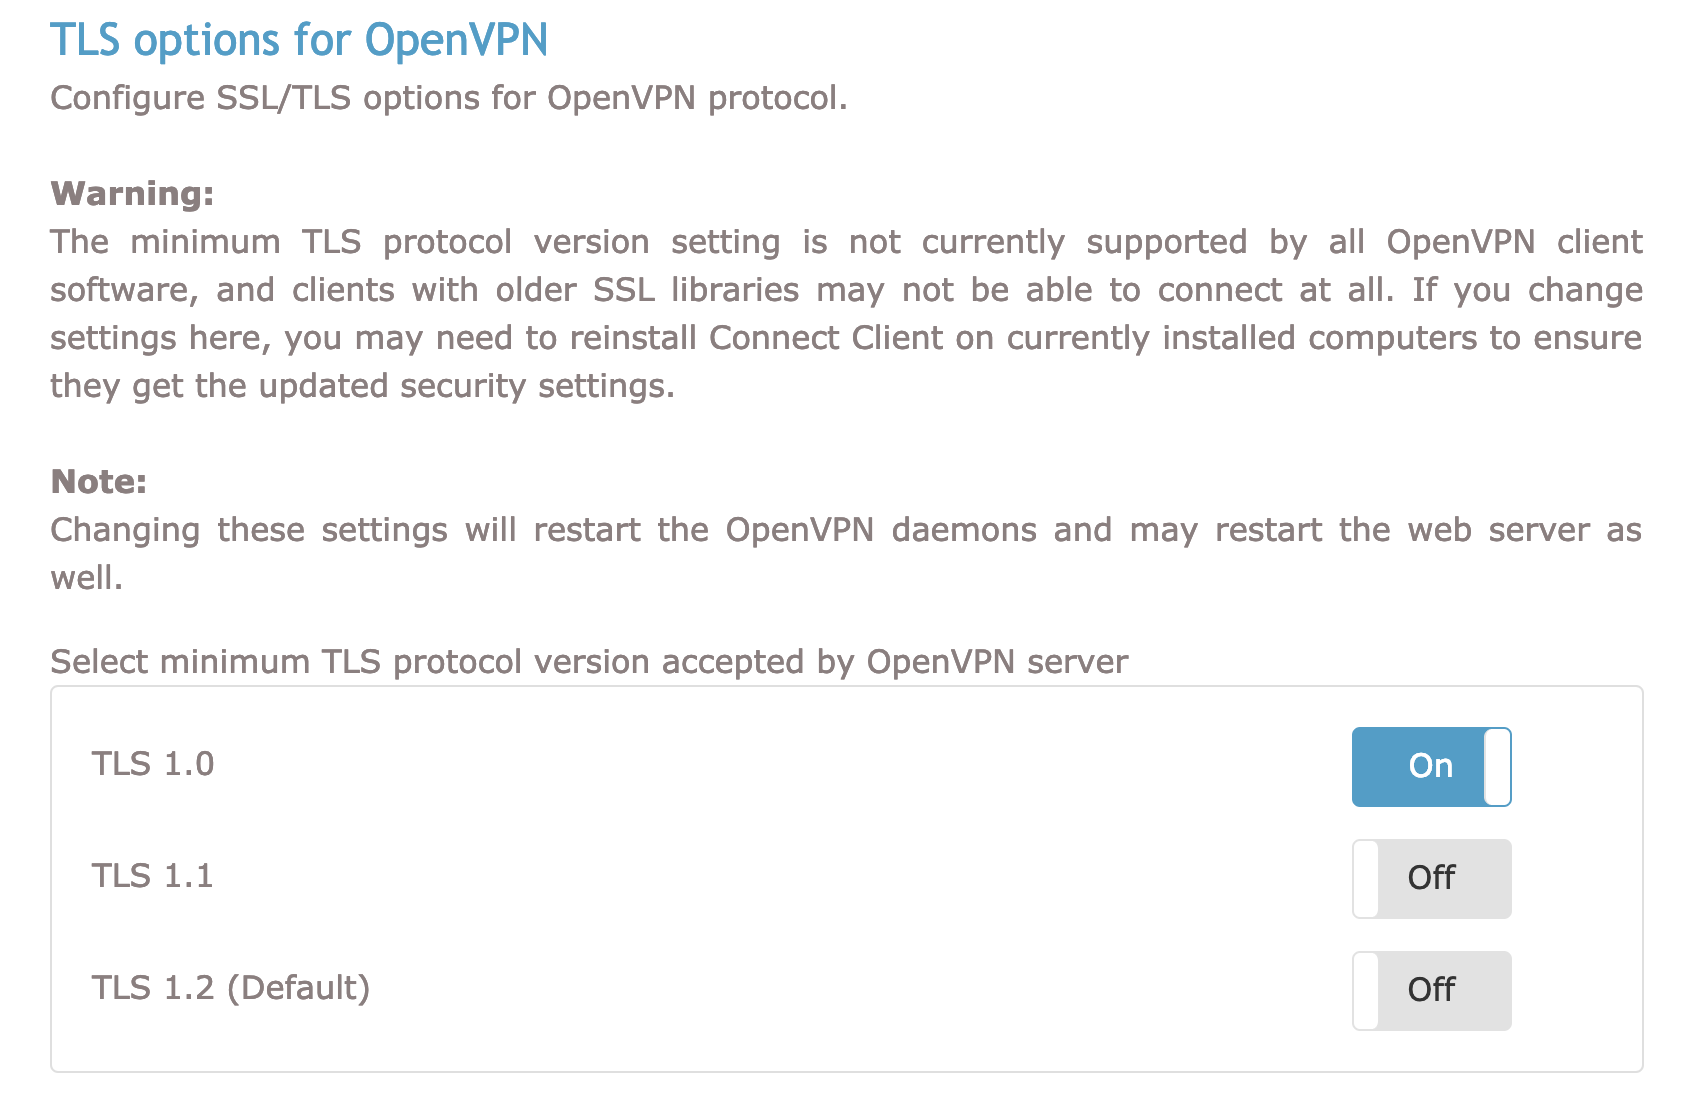
To make OpenVPN play nicely with the ERX, I also had to change the TLS option under Configuration -> TLS Settings from the default of “TLS 1.2” back to “TLS 1.0”, for reasons explained here.
After changing the TLS setting, the VPN established on both sides, and my openvpn access server can ping a linux box at home behind the ERX :)
openvpnas@openvpnas2:~$ ping 192.168.29.3
PING 192.168.29.3 (192.168.29.3) 56(84) bytes of data.
64 bytes from 192.168.29.3: icmp_seq=1 ttl=63 time=44.0 ms
64 bytes from 192.168.29.3: icmp_seq=2 ttl=63 time=44.2 ms
64 bytes from 192.168.29.3: icmp_seq=3 ttl=63 time=44.3 ms
^C
--- 192.168.29.3 ping statistics ---
3 packets transmitted, 3 received, 0% packet loss, time 2002ms
rtt min/avg/max/mdev = 44.022/44.200/44.359/0.279 ms
openvpnas@openvpnas2:~$
I haven’t yet made the routing table changes in the VPC to forward traffic from my instances to my home network via the OpenVPN, but that’ll be the next step!